 I just recently had my first ride on Saint Croix and wanted to share a little bit about the process that I went through.
I wanted to make sure that we both felt comfortable and relaxed and have it be a good experience. When I first got Saint he earned the nickname Chili Pepper, because it was a little bit spicy. He wouldn’t let me catch him for the first couple of days and just generally needed some time to get comfortable in his new surroundings. Saint was a little bit anxious and nervous and would paw, pace the fence, toss his head and was emotional. Yet he was also super friendly and curious so it didn’t take long until he settled in.
I decided that it would be better if I let Saint have a little bit of time before I asked anything of him. It wasn’t long until I was able to halter him, or put a fly mask on. I slowly started asking for more like picking up a foot or grooming him.

This is when I started doing some refresher learning myself about R+ (Positive Reinforcement) training. I listened to several more podcasts and watched some YouTube videos on the topic. Back in 2021 I had used R+ with Jovi and it helped tremendously.
I spent a couple more weeks doing the basics – rope work, leading, tying, picking up feet and doing some liberty work getting Saint to follow me through an obstacle course. He eagerly participated and learned quickly and at this point I was offering positive reinforcement in the form of pats and praise with an occasional small piece of carrot.
 Then I started using the clicker and started adding more voice cues to Saint’s repertoire. I put my driving curcingle on him with two lines for reins and a bridle with a snaffle and started ground driving. At this point he had already shown that he was fine about ropes all over his body and legs, or being dragged on either or both sides of him. Now we were progressing to actually driving him with me behind him. He quickly learned ‘walk’, and ‘whoa’. When he did what I wanted, I would click, then drop the reins and walk up to his head and reward him with some timothy pellets or a small piece of carrot.
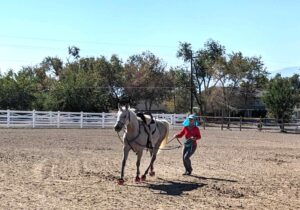 At first I kept the lessons fairly short always ending on a good note. In a handful of lessons Saint was ground driving through and over obstacles and all over the property. He could walk, trot, stop, turn and back with precision. This is when I decided it was time to get on him for the first time.

In between the ground driving lessons I was also working on R+ target training. I used a large sponge on the end of a ski pole.
By the second click followed by some timothy pellets Saint had it figured out. He now would go anywhere I placed the target (the sponge on the pole) and touch it when I said “tap”, and hold his nose to it for a few seconds. Followed by a reward of pellets held away from my body, so he was also learning to “stay out of my space”. Now he knows that term when I use it while waving my arms close to my body. He won’t get his reward if he isn’t respectful of my space or gets pushy, or lippy. So far he has been super delicate and polite about the treat rewards.
 This is where the power of both latent and observational learning was so obvious with Saint. I wasn’t doing the same traininng lessons, or any some days at all because I was working with another horse while Saint observed.
Latent learning is the theory that horses learn after having a few days to process a lesson. This is why doing a ground driving lessons every two or three days really showed how well Saint was improving and how he was figuring it out mentally. I can give more examples of this in future posts as it is a fascinating topic.
One of the R+ target training I did with Saint to get him ready for having a rider mount was relatively easy. I simply had him follow the target to line up next to various objects that I could stand on – an upside down half barrel, a mounting block, a railroad tie. Then I leaned over his back while holding the target out to one side or the other and asked him to “tap”, then clicked and rewarded. This way he got comfortable with me leaning over his back but also understood that he was also going to get rewarded by turning his head around and taking it from my hand in the same position it would be in once I was mounted.
 Over the course of ground driving we went from using the driving curcingle to fully tacking Saint up. R+ training worked well for that as well and he readily accepted all of his tack including a crupper, breast collar and hoof boots.
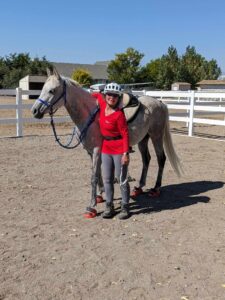
Saint lined himself up perfectly to my mounting block using the target. He will follow the target and go anywhere I direct him now. That makes mounting easy and eventually we’ll be doing it reliablly without needing the target. Now I stood up in the stirrup on one side, gave him a treat while leaning over his back. He was so calm and relaxed that I just threw my leg over the saddle and then praised him and gave him another reward. We both felt safe. All the weeks of groundwork had melted away Saint’s anxiousness.
 I had my husband lead us around for a minute then I dismounted and went up to the front arena where I mounted back up again. I followed the same process with positive rewarding Saint’s good behavior.
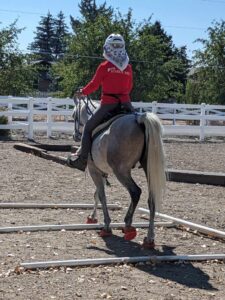
Now we simply did a short lesson going through and over some of the obstacles. We walked, trotted, turned, stopped and backed a couple of steps. Ended on a good note and then led back to the barn to untack.
Rather than go into a huge amount of detail on R+ I’m going to add a couple of links below for those interested in listening to podcasts or watching videos on the topic.
R+ is a proven method for training horses and can be done relatively inexpensively. I used items that I already had to make a target and have been using timothy hay pellets that I keep in an old fanny pack, plus a clicker that I had. A voice click will also work.
These links will get anybody started learning about Positive Reinforcement training. There are lots more resources including groups on FB for those that would like to learn more. It is all in the timing. In some cases I felt that listening to a podcast to be more helpful and other times watching a video. Kind of like my horses, I also learn using different methods, or a combination of them.
Equine Clicker Training 101, Shawna Karrasch podcast
How to Start Clicker Training with Positive Reinforcement video
Alexandra Kurland Video Catalog on Clicker Training

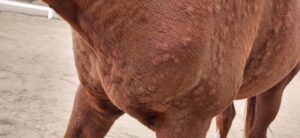 I’m still not sure what caused Jovi to get hives last week. He didn’t have them when I feed in the morning but two hours later he presented with hives on his neck, shoulders, sides and hindquarters.
 I gave Jovi some Tri-Hist and then some Cimetidine and took him for a long walk. That seemed to help. Things were looking better on Tuesday morning and that is when it was recommended to me to try putting some Redmond clay on the hives. Brilliant! I did that twice a couple of hours apart along with cold hosing and the hives just about disappeared completely.
 On Wednesday I took Jo out for a 10 mile ride and got in some hillwork and a good sweat. I was also keeping Jo out of that particular paddock. Now it’s been a week and no sign of the hives returning. If this happens again I’ll start with getting Jovi some exercise followed by the Redmond Clay, and then cold hosing.
 Here is a description of the Redmond Clay: Redmond Red Edge Natural Soothing Clay Poultice is a poultice for horses that is made with hydrated bentonite clay and pure essential oils. It is a natural analgesic that can relieve sore muscles, tendons, bruises, sprains, and hot spots. It can also be used on hooves to provide relief for soreness and abscesses.
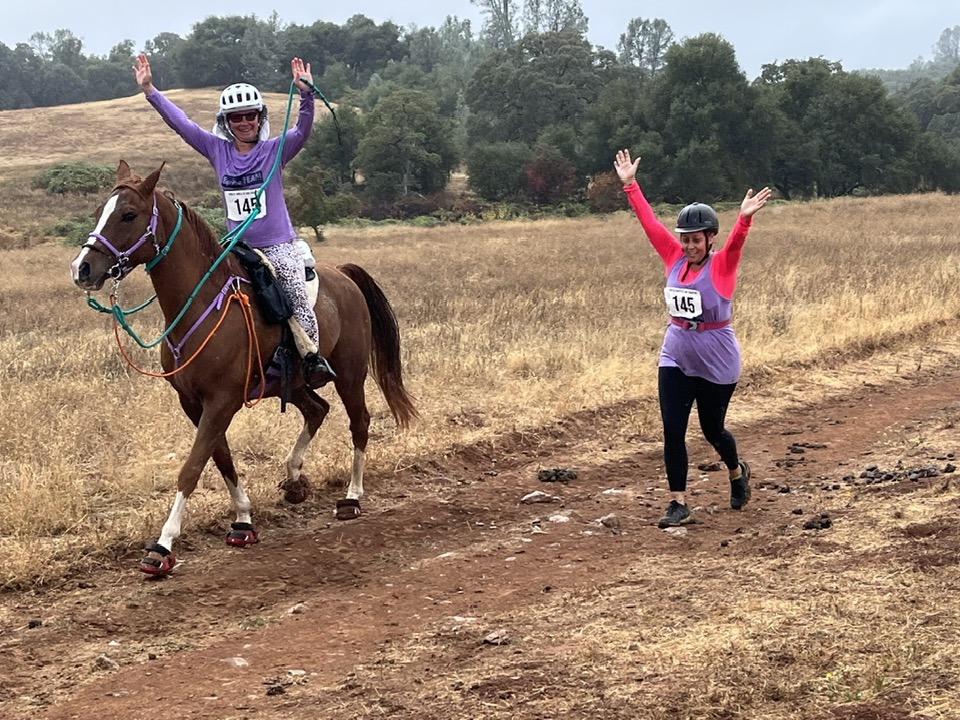 Last weekend my new Ride and Tie partner Jennifer, Jovi (horse) and myself completed the 9 mile short course at the Coolest Ride and Tie in Cool, CA. Yesterday Jennifer and I did an interview with the
 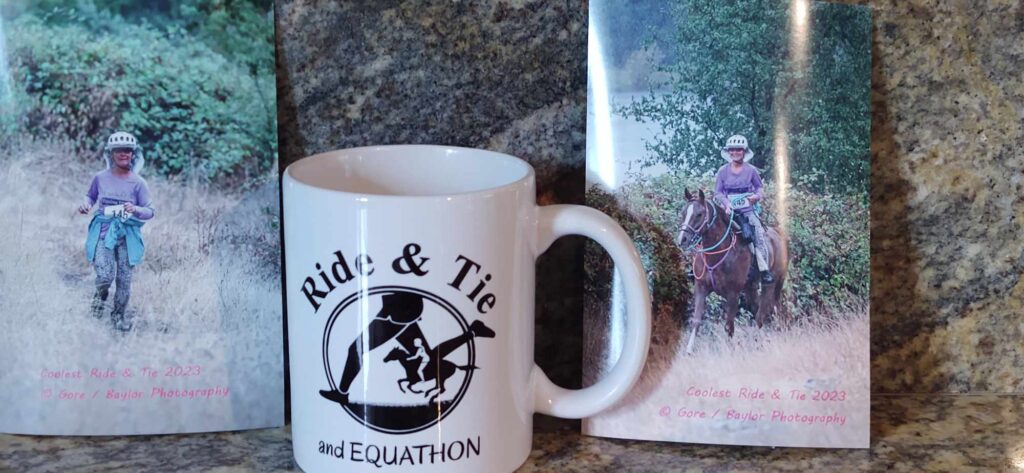 We had a great time and I wanted to mention a couple of things that we didn’t really get to in the interview. The first one being that the sport of Ride and Tie is a really affordable equestrian sport. The entry fees are lower than I am used to for endurance but actually half that since there are two people paying it works out to being 50% or less. That is a great deal to give a new sport a try, get some new experiences for you and your horse plus make new friends! You get a nicely marked trail, vetting, aid stations and afterwards awards and a meal. We also had ride photographers and live music.
 The next thing that I really liked is that the Ride and Tie Association has only 20 rules. They all fit on a single page! Whereas the AERC has a rule ‘book’, which is 16 pages long. I totally get that there are reasons why AERC needed to have more rules. I’m just sharing that I thought it was refreshing that R&T was so simple and uncomplicated. I felt that it made things a lot more laid back and less stressful. There is so much flexibility and it was great to see how the sport attracts people of all ages and fitness levels.