
🦖🎥 As a kid, I ditched Barbies for plastic T-Rexes faster than you can say “Cretaceous,” so you bet I was first in line for *Jurassic World: Rebirth* today, popcorn in hand and dino dreams in my heart 🦕🍿.
 Spoiler alert: this flick isn’t the fossilized masterpiece of the original *Jurassic Park*, but it’s got enough roars, chases, and head-scratching moments to keep a dino nerd like me entertained. Saddle up, endurance riders—this review’s got thrills, spills, and a few eye rolls bigger than a bucking bronco!
🐎A Stampede of Clichés That Had Me Yelling at the Screen 😆 After seven *Jurassic* movies, we know the drill: shady corporate types, squabbling scientists, and a kid in peril (because, apparently, no dino flick is complete without one). *Rebirth* follows Zora Bennett (Scarlett Johansson, kicking butt like a trail boss), a gritty mercenary, and Dr. Henry Loomis (Jonathan Bailey, basically a dino fanboy with a PhD), on a mission to snag DNA from mega-dinosaurs for a heart disease cure. Cue a shipwrecked family, a forbidden island, and a whole lotta teeth. Sounds fun, right? Sure, but the clichés hit harder than a spooked gelding. I lost track of how many times I muttered, “Don’t do that!” 🙅♀️, “Turn around!” 👀, “Pay attention!” 😡, or the classic, “Watch the kid!” 🧒 as characters made dino-sized dumb decisions. Splitting up on a predator-packed island? Ignoring rustling bushes? It’s like they’ve never seen a *Jurassic* movie! Maybe these are only clichés because we’ve watched this franchise outrun a thousand raptors, but the first act drags like a green horse on a long trot, bogged down by clunky exposition. I was ready to yell, “Unleash the dinos already!” 🦖
New Dinos and a T-Rex River Chase That’ll Chomp Your Heart 🦕 Despite the predictable plot, *Rebirth* delivers where it counts: the dinosaurs. The new beasts—like the Distortus Rex (think T-Rex meets Alien nightmare) and Mutadons (winged raptor-pterosaur freaks)—are straight-up terrifying. Gareth Edwards’ direction and ILM’s CGI magic make these critters feel so real, I half-expected to dodge a tail on my ride home 🐴.
The real star? The T-Rex river chase 🌊🦖. Pulled from Michael Crichton’s original Jurassic Park novel (cut from the ’93 film due to CGI limits), this scene is a heart-pounding masterpiece. The Delgado family, stranded on the dino-infested island, piles onto an inflatable raft only to get hunted by a *swimming T-Rex*. Yep, you read that right—this bad boy’s doing laps like a prehistoric Michael Phelps! The tension’s tighter than a cinched saddle, with Jaws-level suspense as the T-Rex flips the raft. The kid’s in danger (of course), and my heart was galloping faster than Jovi at a vet check. The payoff? So satisfying, I nearly stood up and cheered 🎉. This sequence alone is worth the ticket price.
Overcooked Drama and a Helicopter-Snatching LOL 😅 *Rebirth* tries to stretch the suspense like a trail ride that’s two hours too long. The first half lingers on family drama and team bickering when I just wanted more dino chaos. And don’t get me started on the boat scene—why is everyone leaping off like the Mosasaur yelled, “Abandon ship!”? 🚤 It’s like dismounting mid-gallop because you *think* your horse is spooked. Slow down, folks!
Then there’s the helicopter scene (*spoiler alert!* 🚁). A massive dino—let’s call it Jaws on steroids—snatches a chopper out of the sky like it’s grabbing a mid-flight snack. I mean, *come on*! No way that beast walks away without chapped lips at best or a serious case of chopped ones from those spinning blades 🪒. It’s a jaw-dropping visual, but my suspension of disbelief took a bigger hit than a T-Rex tail swipe. Even for a dino diehard like me, that moment had me snorting louder than my horse at a water crossing 😆.
A Roaring Good Time, But No Fossilized Classic 🌟 Jurassic World: Rebirth is a dino-mite popcorn flick that leans hard on nostalgia and spectacle. The T-Rex river chase is a show-stealer, and the new dinosaurs are scary enough to make you double-check your barn for raptors. But the clichéd plot and paper-thin characters keep it from outrunning the original *Jurassic Park*. It’s like riding a trusty trail pony—it gets you to the finish line, but don’t expect it to win the Tevis Cup. As a lifelong dino lover who’s been dodging Barbies for T-Rexes since kindergarten, I’ll always show up for these movies, even when they’re more “meh” than “roar.” This one’s got enough teeth to keep you entertained, even if you’re yelling at the screen half the time. **Rating**: 6.5/10 – A fun romp for dino fans, but it’s no king of the *Jurassic* jungle 🦖. Would I watch it again? You bet—those dinos are too cool to skip. Will I yell “Don’t do that!” again? Like a trail boss herding newbies, absolutely 😄. What’s your take on *Rebirth*? Did the T-Rex river chase give you chills, or were you rolling your eyes at the helicopter snack? Drop a comment below—I’m dying to swap dino tales! 🦕💬 Happy trails (and watch out for those velociraptors),
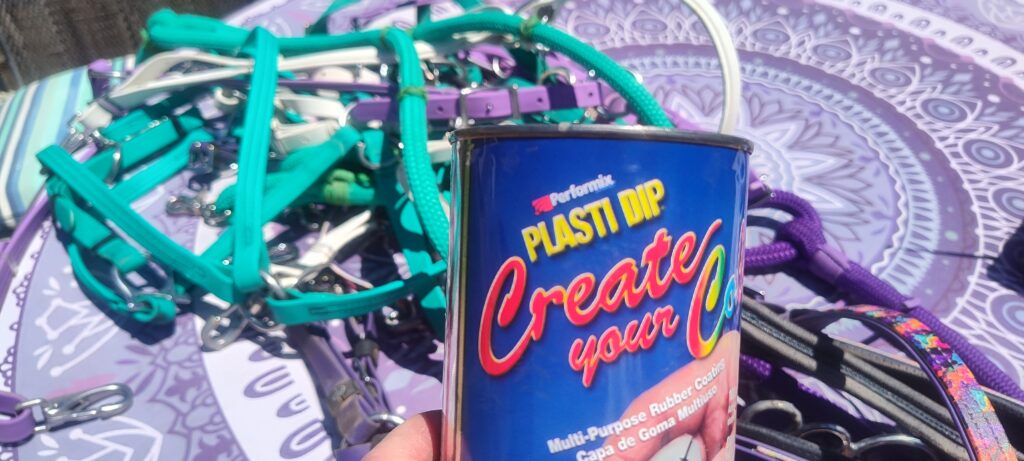 As an endurance rider, I’m constantly chasing ways to make my rides smoother, safer, and more enjoyable for both me and my horses. Years ago, I discovered a barn game-changer: a liquid rubber dip that’s become my secret weapon for taming noisy tack and protecting gear. Trust me—this stuff is a must-have for any horse lover, and it might just become your new trail-side bestie!
 Why a Rubber Coating?
 A Barn Superhero with Endless Uses
 My Yearly Refresh Routine
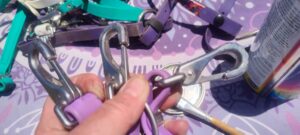 Give It a Try!
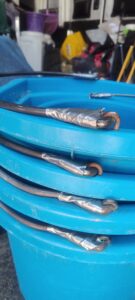
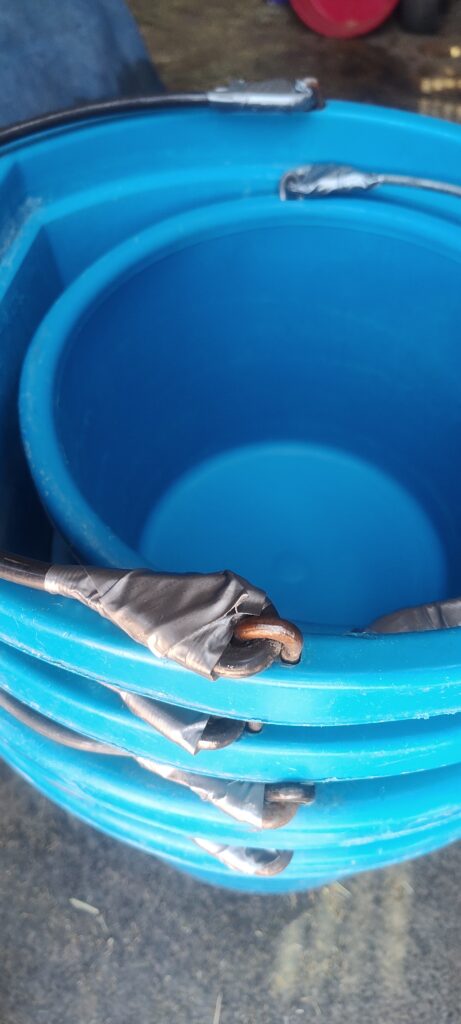
 First up, I grabbed my trusty roll of duct tape and went to town on every bucket handle I could find—stall buckets, feed buckets, trailer buckets, you name it. Why? Those sneaky rubber protectors on bucket handles have a habit of slipping off, leaving a gap that’s practically begging for trouble. I’ve seen it too many times at endurance events: a horse gets caught on an exposed handle, and it’s a recipe for disaster. From painful scrapes to full-on panic, it never ends well.
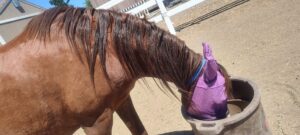 Plus, those gaps can wreak havoc on a horse’s mane or tail. Cowboy’s been working hard for years to grow out his glorious mane, and I’m not about to let a rogue bucket ruin his style! A few strips of duct tape over those handles create a smooth, snag-free surface, keeping my horses safe and their locks intact.
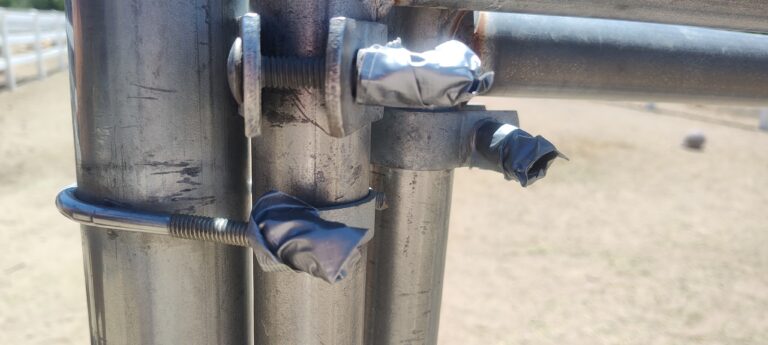
 Next, I took a stroll around the property to inspect fences and gates—because nothing says AWTH like a protruding screw or sharp edge. Any hardware sticking out got a generous wrapping of duct tape. Sure, a determined horse might still find a way to get a bump or bruise, but a few layers of tape can make all the difference, softening the impact and reducing the risk of serious injury. It’s a small step that adds a big layer of protection to my peace of mind.
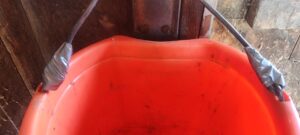 These quick fixes—duct tape on bucket handles and overexposed hardware—might seem small, but they’re game-changers in the world of horse safety. As endurance riders, we know our horses give their all on the trail. The least we can do is make their home base a safe haven, free from preventable accidents. Plus, who doesn’t love a low-cost, high-impact solution that keeps both horse and rider smiling? So, grab that duct tape, do a barn walk-through, and let’s keep those AWTHs at bay. Your horse (and their fabulous mane) will thank you!


 I am planning on entering the Virtual Tevis again. I am still deciding on if I want to do it with more than one horse. The first year I did it I spent most of the 100 miles handwalking Jovi. It turned out to be fabulous for his training and went a long way towards making him a safe and reliable and pretty trustworthy mount. The second time my goal was to ride him the entire 100 miles. I think it would be a great goal for me to sign up with Saint and/or Cowboy to help get them brought along.
 I started my blog back up, and then life happened and I got sidetracked. Having three hoses and three dogs will do that to you. Never mind all of the other things, right? Anyway, I am going to try to keep up with posts and talking about bringing along my three horses – VG Ben Jovi, VG Midnight Cowboy and Saint Croix. I mostly call them Jovi, Cowboy and Saint. Sometimes – Little Jo, CB, and well, just Saint because he pretty much fits that name.
 I have been having so much fun working with all of the horses. I have already put a good couple of years into Jovi and feel that he is a horse that I can trust to take anywhere at this point. Parade safe, ride start safe. But he is opinionated and smart and has realized that his job is to be an endurance horse so I need to be on my full game-on mode with him. I still consider him to be green, or fairly green, maybe not neon but at least grass green, lol. So smart though, and we have really come a long way together. I can’t speak to the future, but so far I can say that Jovi has been my most challenging horse. He has only done one 50 so far, so just barely qualifies as an endurance horse but my goal for him is to be an overall safe horse to ride at various events.

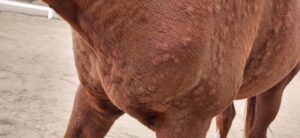 I’m still not sure what caused Jovi to get hives last week. He didn’t have them when I feed in the morning but two hours later he presented with hives on his neck, shoulders, sides and hindquarters.
 I gave Jovi some Tri-Hist and then some Cimetidine and took him for a long walk. That seemed to help. Things were looking better on Tuesday morning and that is when it was recommended to me to try putting some Redmond clay on the hives. Brilliant! I did that twice a couple of hours apart along with cold hosing and the hives just about disappeared completely.
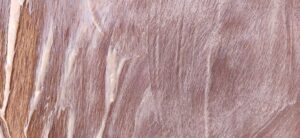 On Wednesday I took Jo out for a 10 mile ride and got in some hillwork and a good sweat. I was also keeping Jo out of that particular paddock. Now it’s been a week and no sign of the hives returning. If this happens again I’ll start with getting Jovi some exercise followed by the Redmond Clay, and then cold hosing.
 Here is a description of the Redmond Clay:
 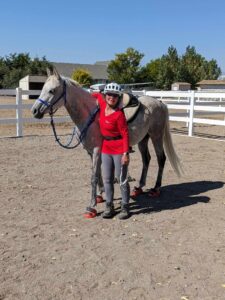 I just recently had my first ride on Saint Croix and wanted to share a little bit about the process that I went through.
 Then I started using the clicker and started adding more voice cues to Saint’s repertoire. I put my driving curcingle on him with two lines for reins and a bridle with a snaffle and started ground driving. At this point he had already shown that he was fine about ropes all over his body and legs, or being dragged on either or both sides of him. Now we were progressing to actually driving him with me behind him. He quickly learned ‘walk’, and ‘whoa’. When he did what I wanted, I would click, then drop the reins and walk up to his head and reward him with some timothy pellets or a small piece of carrot.
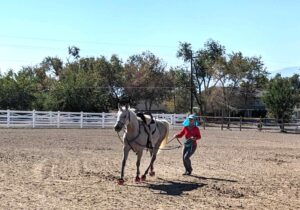 At first I kept the lessons fairly short always ending on a good note. In a handful of lessons Saint was ground driving through and over obstacles and all over the property. He could walk, trot, stop, turn and back with precision. This is when I decided it was time to get on him for the first time.
 This is where the power of both latent and observational learning was so obvious with Saint. I wasn’t doing the same traininng lessons, or any some days at all because I was working with another horse while Saint observed.
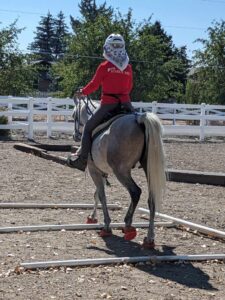
 Over the course of ground driving we went from using the driving curcingle to fully tacking Saint up. R+ training worked well for that as well and he readily accepted all of his tack including a crupper, breast collar and hoof boots.
 I had my husband lead us around for a minute then I dismounted and went up to the front arena where I mounted back up again. I followed the same process with positive rewarding Saint’s good behavior.
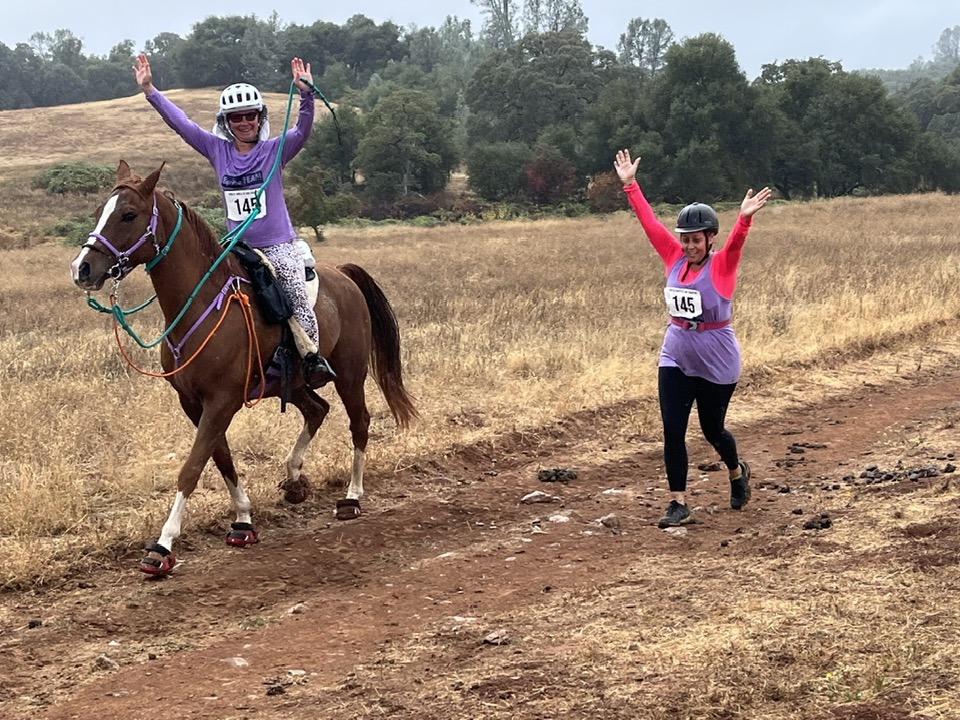 Last weekend my new Ride and Tie partner Jennifer, Jovi (horse) and myself completed the 9 mile short course at the Coolest Ride and Tie in Cool, CA. Yesterday Jennifer and I did an interview with the
 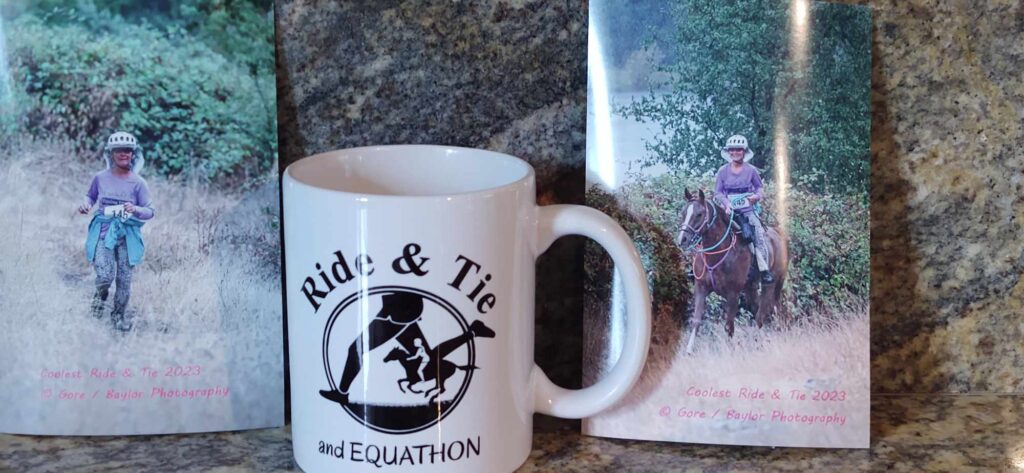 We had a great time and I wanted to mention a couple of things that we didn’t really get to in the interview. The first one being that the sport of Ride and Tie is a really affordable equestrian sport. The entry fees are lower than I am used to for endurance but actually half that since there are two people paying it works out to being 50% or less. That is a great deal to give a new sport a try, get some new experiences for you and your horse plus make new friends! You get a nicely marked trail, vetting, aid stations and afterwards awards and a meal. We also had ride photographers and live music.
 The next thing that I really liked is that the Ride and Tie Association has only 20 rules. They all fit on a single page! Whereas the AERC has a rule ‘book’, which is 16 pages long. I totally get that there are reasons why AERC needed to have more rules. I’m just sharing that I thought it was refreshing that R&T was so simple and uncomplicated. I felt that it made things a lot more laid back and less stressful. There is so much flexibility and it was great to see how the sport attracts people of all ages and fitness levels.
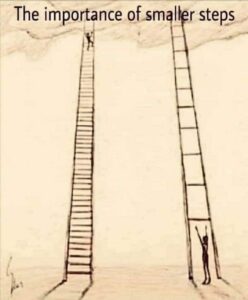 VG Midnight Cowboy and Saint Croix both arrived here a month ago. Since then I’ve been working with them on a lot of basic groundwork while giving them the space and time to settle in to their new home.
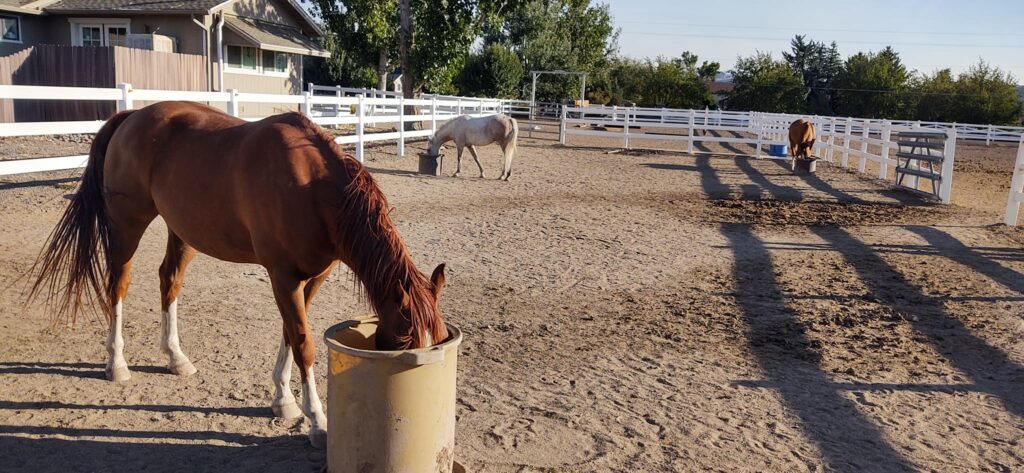 I learned to separate Jovi for some feedings while making sure that plenty of hay was spread around in a way so that the two new horses wouldn’t get cornered. I have since picked up a 3rd
 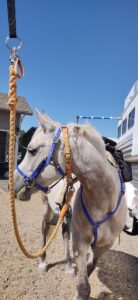 I’ve been getting Saint and Cowboy used to eating wet mashes made from
  1. Fly Masks: Saint and Cowboy are now comfortable with putting fly masks on and off. They weren’t sure about the velcro sound at first but now are totally fine with it.
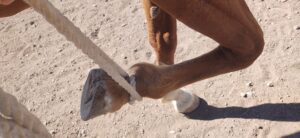
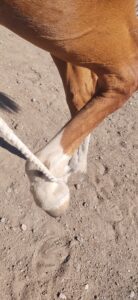 4. Cotton Rope: Both were easy to work with on the ground using a cotton rope. I have put the rope around their bodies and used it to pick up each leg forward and back. I also have allowed each horse to drag a shorter rope. No panicking or stress, just calm horses enjoying getting attention. Each horse watches the other one get worked and then tries to show off when it is their turn. I’ve been really impressed with how fast they pick stuff up.
 5. Longing: We started with just simply walking in a circle and progressed up to now the horses both longe each direction on a line and at liberty. It will take more time for them to be proficient with all of the voice cues. I prefer to work them at liberty in a larger area over using a line and doing small circles.
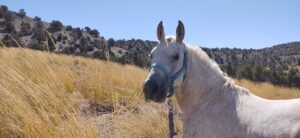 7. Tied to the trailer: Each horse has taken turns together or with Jovi being tied on the trailer. I have the Trailer Ties out with hay bags and water buckets on the trailer. This is when I spend time grooming them, picking up feet and letting them just hang out, eat and watch all of the goings on.
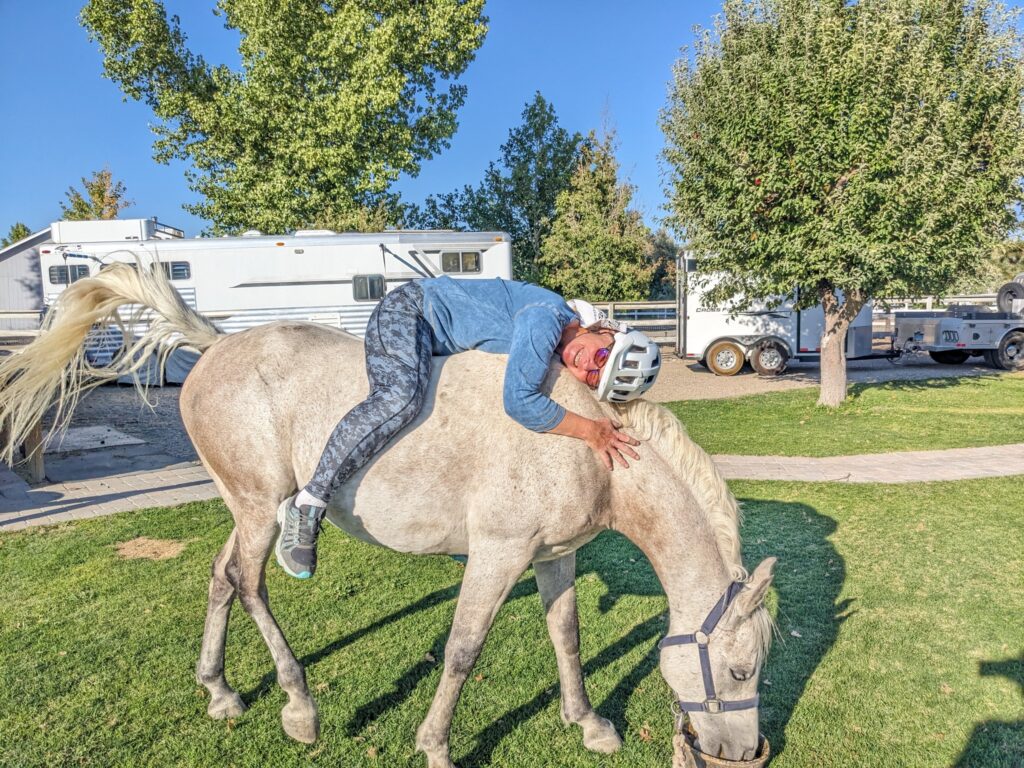 So I’d say that we have made a lot of progress already. I am taking it slow and careful with the new horses. I realize that mentally they both need time to get settled and comfortable in their new home. It is different for each horse though I feel that usually it takes about six months.