
 As an endurance rider, I’m constantly chasing ways to make my rides smoother, safer, and more enjoyable for both me and my horses. Years ago, I discovered a barn game-changer: a liquid rubber dip that’s become my secret weapon for taming noisy tack and protecting gear. Trust me—this stuff is a must-have for any horse lover, and it might just become your new trail-side bestie!
 Why a Rubber Coating?
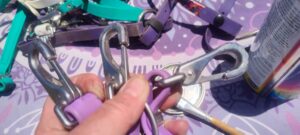
It’s All About Horse Comfort Back in my heavy-riding days, I noticed my horses’ brass tack was leaving them with green-tinted coats—not exactly the championship look we’re aiming for! But the real kicker? Those metal clips and buckles clanking like a one-horse percussion band. That noise drives me up the wall (I’m all about zen rides), and it can seriously bug a sensitive horse like my pal Jovi. When he’s stuck trailing slower horses, his sassy head tosses scream, “Get me outta here!” The last thing he needs is jangling tack adding to his grump-fest. Enter the magic of a liquid rubber dip. This rubbery coating mutes those annoying metal-on-metal sounds and keeps tack from staining my horses’ coats. It’s like wrapping your gear in a horse-friendly, soundproof blanket—peaceful rides, here we come!
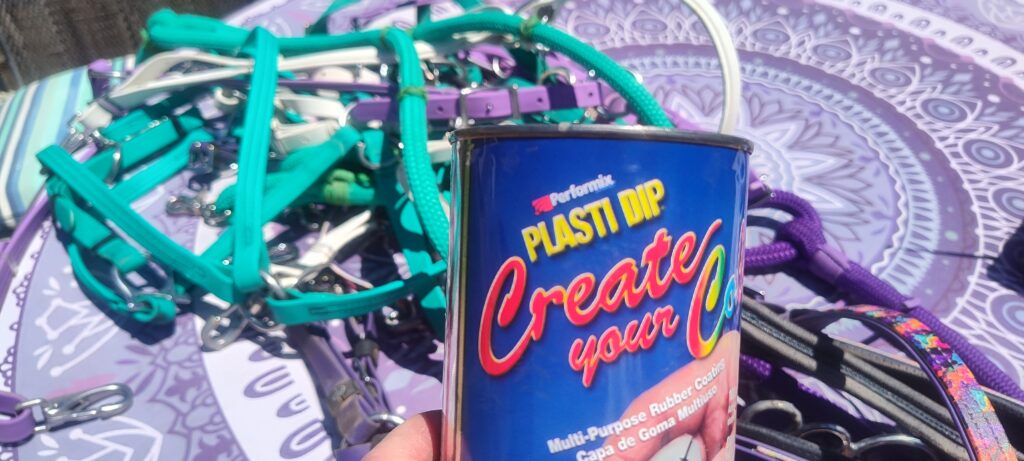
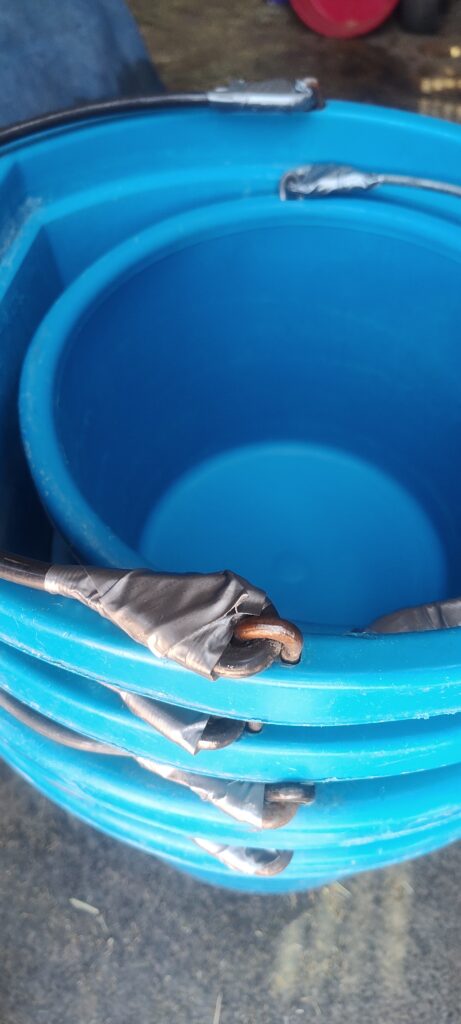
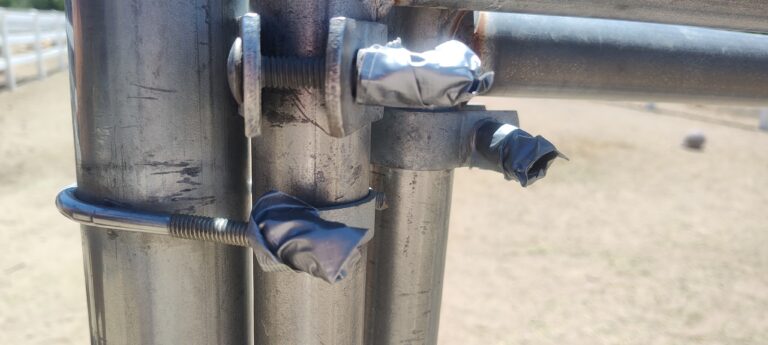
 A Barn Superhero with Endless Uses
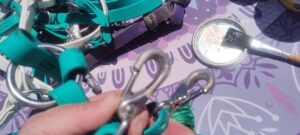
This rubber coating isn’t just for tack—it’s a multi-tasking marvel! I brush or dip it onto the wooden handles of my tools and wheelbarrow to shield them from wear and save my hands from splinters (because, ouch, no thanks!). I also use the clear version on my carbon-fiber Pandora saddles to protect them from scratches where packs, breast collars, or clipped-on goodies like hoof picks, sponges, or feed scoops might rub. The best part? It’s practically invisible but works overtime to keep my saddle in tip-top shape. Available in cans for brushing or dipping, or as a spray for quick jobs, this coating is a breeze to apply. From bit hangers and reins to breast collars, name tags, and lead ropes—if it’s metal and might clink, I’m coating it! I usually grab mine from Amazon, though I think I first stumbled across it at a local hardware store. (No affiliate links here, just a rider sharing a tip I’ve loved for decades!)
 My Yearly Refresh Routine
Every year or two, I carve out a day for a tack tune-up. I inspect my gear, hunting for spots where the rubber coating has worn thin from heavy trail use. Today, I slathered a fresh layer on my go-to items—bits, reins, breast collars, you name it. After letting it dry overnight (patience is a virtue!), I’ll add a second coat tomorrow for extra toughness. Most of my tack already has a base layer, but a quick refresh keeps everything silent and protected. Got new tack? It gets the liquid rubber treatment right out of the gate to head off any clinking catastrophes.
Keeping Jovi in His Happy Zone Why go to all this effort? Because a content horse makes for a joyful ride! Jovi’s my rockstar, but when he’s stuck in a slowpoke conga line, his head-tossing says, “Not cool, Mom.” By ensuring his tack stays quiet and irritation-free, I keep him comfy until I can pass and let him hit his stride. A little rubber coating goes a long way toward keeping the peace—for Jovi and my sanity.
 Give It a Try!
If you’re fed up with jingling tack, green-stained horses, or splintery tool handles, grab some liquid rubber dip and get coating. It’s affordable, easy to use, and transforms your barn life. Your horses will thank you for the quieter, comfier rides, and you’ll love the low-effort, high-impact results. Who doesn’t adore a barn hack that’s as practical as it is fun? So, what’s your go-to trick for keeping tack trail-ready? Drop a comment below—I’m all ears for swapping clever barn hacks!
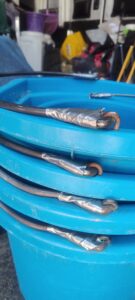
 First up, I grabbed my trusty roll of duct tape and went to town on every bucket handle I could find—stall buckets, feed buckets, trailer buckets, you name it. Why? Those sneaky rubber protectors on bucket handles have a habit of slipping off, leaving a gap that’s practically begging for trouble. I’ve seen it too many times at endurance events: a horse gets caught on an exposed handle, and it’s a recipe for disaster. From painful scrapes to full-on panic, it never ends well.
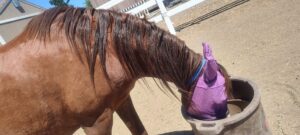 Plus, those gaps can wreak havoc on a horse’s mane or tail. Cowboy’s been working hard for years to grow out his glorious mane, and I’m not about to let a rogue bucket ruin his style! A few strips of duct tape over those handles create a smooth, snag-free surface, keeping my horses safe and their locks intact.
 Next, I took a stroll around the property to inspect fences and gates—because nothing says AWTH like a protruding screw or sharp edge. Any hardware sticking out got a generous wrapping of duct tape. Sure, a determined horse might still find a way to get a bump or bruise, but a few layers of tape can make all the difference, softening the impact and reducing the risk of serious injury. It’s a small step that adds a big layer of protection to my peace of mind.
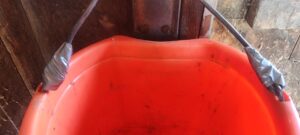 These quick fixes—duct tape on bucket handles and overexposed hardware—might seem small, but they’re game-changers in the world of horse safety. As endurance riders, we know our horses give their all on the trail. The least we can do is make their home base a safe haven, free from preventable accidents. Plus, who doesn’t love a low-cost, high-impact solution that keeps both horse and rider smiling? So, grab that duct tape, do a barn walk-through, and let’s keep those AWTHs at bay. Your horse (and their fabulous mane) will thank you!


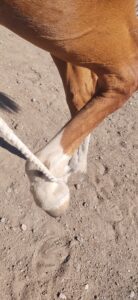
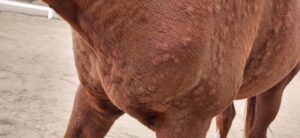 I’m still not sure what caused Jovi to get hives last week. He didn’t have them when I feed in the morning but two hours later he presented with hives on his neck, shoulders, sides and hindquarters.
 I gave Jovi some Tri-Hist and then some Cimetidine and took him for a long walk. That seemed to help. Things were looking better on Tuesday morning and that is when it was recommended to me to try putting some Redmond clay on the hives. Brilliant! I did that twice a couple of hours apart along with cold hosing and the hives just about disappeared completely.
 On Wednesday I took Jo out for a 10 mile ride and got in some hillwork and a good sweat. I was also keeping Jo out of that particular paddock. Now it’s been a week and no sign of the hives returning. If this happens again I’ll start with getting Jovi some exercise followed by the Redmond Clay, and then cold hosing.
 Here is a description of the Redmond Clay:
  VG Midnight Cowboy and Saint Croix both arrived here a month ago. Since then I’ve been working with them on a lot of basic groundwork while giving them the space and time to settle in to their new home.
 I learned to separate Jovi for some feedings while making sure that plenty of hay was spread around in a way so that the two new horses wouldn’t get cornered. I have since picked up a 3rd
  I’ve been getting Saint and Cowboy used to eating wet mashes made from
  1. Fly Masks: Saint and Cowboy are now comfortable with putting fly masks on and off. They weren’t sure about the velcro sound at first but now are totally fine with it.
 4. Cotton Rope: Both were easy to work with on the ground using a cotton rope. I have put the rope around their bodies and used it to pick up each leg forward and back. I also have allowed each horse to drag a shorter rope. No panicking or stress, just calm horses enjoying getting attention. Each horse watches the other one get worked and then tries to show off when it is their turn. I’ve been really impressed with how fast they pick stuff up.
 5. Longing: We started with just simply walking in a circle and progressed up to now the horses both longe each direction on a line and at liberty. It will take more time for them to be proficient with all of the voice cues. I prefer to work them at liberty in a larger area over using a line and doing small circles.
 7. Tied to the trailer: Each horse has taken turns together or with Jovi being tied on the trailer. I have the Trailer Ties out with hay bags and water buckets on the trailer. This is when I spend time grooming them, picking up feet and letting them just hang out, eat and watch all of the goings on.
 So I’d say that we have made a lot of progress already. I am taking it slow and careful with the new horses. I realize that mentally they both need time to get settled and comfortable in their new home. It is different for each horse though I feel that usually it takes about six months.
 A few years ago I bought a tub of zinc oxide powde and have been using it ever since. I think this tub will last me a lifetime so ultimately the cost per application is very small. Of course, the price has nearly doubled, but what hasn’t?
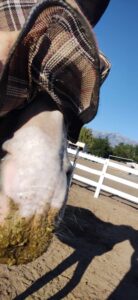 I also use fly masks with the longer nose covers on them to help provide more sun protection. Jovi is used to his daily beauty treatments. Today was the first day that Cowboy had his nose powder puffed. He wasn’t quite sure about it but handled it well and I am sure in another week it will be old hat for him.
 The tub that I am using is from Earthborn and it is a non-nao particle powder. It is currently on sale for 20% off at Amazon.